
The Colt 1911 is a legendary pistol․ Mastering its disassembly and reassembly ensures proper maintenance and functionality, essential for every firearms enthusiast and professional․
Overview of the Colt 1911 Pistol

The Colt 1911 is a legendary single-action, semi-automatic pistol designed by John Moses Browning․ First adopted by the U․S․ military as the M1911, it served for over 70 years․ Known for its reliability, accuracy, and durability, the 1911 has become iconic among firearms enthusiasts․ Chambered in ․45 ACP, it is celebrated for its stopping power and ergonomic design․ Over the years, various models have emerged, including the M1911A1 and modern variants like the Series 70 and 80․ The 1911’s modular design allows for easy customization, making it a favorite for both collectors and competitive shooters․ Its enduring popularity underscores its historical significance and timeless appeal․
Importance of Proper Disassembly and Reassembly
Proper disassembly and reassembly of the Colt 1911 are critical for maintaining its functionality, safety, and longevity․ Regular maintenance ensures the pistol operates flawlessly, as neglecting these steps can lead to malfunctions․ Disassembly allows for thorough cleaning and inspection of internal components, preventing wear and tear from accumulating․ Reassembly, when done correctly, restores the pistol’s precision and reliability․ Improper techniques can damage vital parts, such as the ignition system or barrel link, which are essential for accurate firing․ Veteran gunsmiths emphasize the need for patience and attention to detail to avoid forcing parts into place, which can cause irreversible harm․ By following structured steps, enthusiasts can ensure their Colt 1911 remains in optimal condition for years of dependable service․

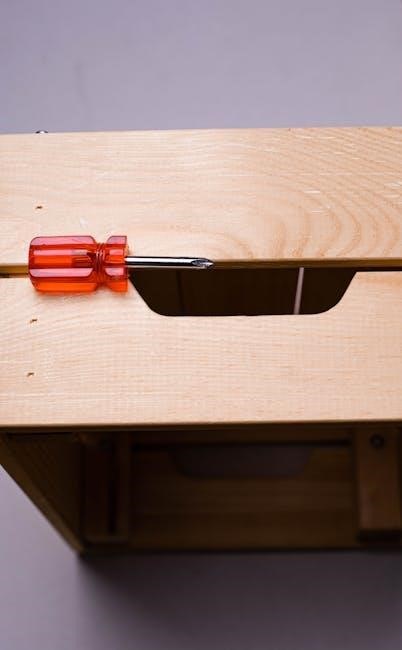
Tools and Materials Needed
A roll pin punch set, screwdriver, and Allen wrench are essential for Colt 1911 disassembly; Optional tools include a plastic hammer and snap caps for safety․

Essential Tools for Disassembly and Reassembly
The primary tools needed for Colt 1911 disassembly and reassembly include a correctly sized roll pin punch set and a screwdriver․ These are indispensable for removing pins and screws without damaging the firearm․ A plastic hammer or nylon mallet is often used to tap parts gently into place․ For models with a two-piece full-length guide rod, a 5/32 Allen wrench is required to remove the front portion․ Optional tools like snap caps can protect the firing pin during disassembly․ Having these tools ensures a smooth and scratch-free process․ They are essential for both field stripping and detailed maintenance, allowing you to handle the pistol safely and effectively․
Optional Tools for Detailed Maintenance

While essential tools suffice for basic disassembly and reassembly, optional tools enhance precision and ease, especially for detailed maintenance․ These include a roll pin punch set, plastic or brass hammers, and screwdrivers․ A 5/32 Allen wrench is useful for models with two-piece guide rods․ For deep cleaning, a bore brush and solvent are recommended․ Custom or match-grade models may require specialized punches or alignment tools․ A workbench vise can stabilize the pistol during intricate procedures․ Additionally, a set of precision screwdrivers ensures adjustments are made without marring components․ These tools are invaluable for enthusiasts or gunsmiths aiming for meticulous maintenance and customization of their Colt 1911․
Step-by-Step Disassembly Process
Begin by removing the magazine and ensuring the chamber is empty․ Next, remove the recoil spring and barrel․ Use a screwdriver or punch to take out the slide stop, allowing the slide to disassemble further for detailed maintenance and cleaning․
Step 1: Magazine Removal and Chamber Check

Begin by ensuring the Colt 1911 is unloaded․ Remove the magazine by depressing the magazine catch located on the right side of the frame․ Once the magazine is removed, visually inspect the chamber to confirm it is empty․ This step is critical for safety, as it ensures no rounds remain in the pistol․ Carefully pull the slide back slightly to visually verify the chamber’s condition․ If any rounds are present, remove them immediately․ This initial step sets the foundation for safe and effective disassembly․ Always handle firearms with caution, and never proceed without confirming the weapon is unloaded․ Proper safety protocols prevent accidents and ensure a smooth disassembly process․

Step 2: Recoil Spring Removal
After ensuring the pistol is unloaded, gently pull the slide rearward to access the recoil spring and guide rod․ Using a roll pin punch, capture the spring to prevent sudden release․ Slowly release the slide forward, allowing the spring to decompress naturally․ For models with a two-piece full-length guide rod, use a 5/32 Allen wrench to remove the front portion before proceeding․ Carefully lift the guide rod and spring assembly out of the slide․ This step requires patience to avoid damaging components or causing accidental spring tension release․ Proper removal ensures safe disassembly and prevents potential damage to internal parts․
Step 3: Slide Stop Removal and Slide Disassembly
After removing the recoil spring, the next step is to take out the slide stop․ Use a roll pin punch to push the slide stop pin out from the right side․ Align the slide stop with the barrel link, then gently pry it out․ Once removed, the slide can be separated from the frame․ Carefully pull the slide forward while lifting it slightly to disengage it from the frame rails․ Set the slide aside and focus on the barrel and barrel link․ Use a punch to remove the barrel link pin, allowing the barrel to tilt downward and be lifted out․ Handle all components with care to avoid loss or damage․ This step requires patience and attention to detail to ensure proper disassembly․

Step-by-Step Reassembly Process
Reassembly begins with the slide stop, followed by the barrel and link․ The ignition system is next, requiring precision․ Finally, reinstall the trigger, magazine catch, grip safety, and mainspring to complete the process․
Step 1: Reinstalling the Slide Stop
Reinstalling the slide stop is the first step in reassembling the Colt 1911․ Ensure the slide stop is properly aligned with the frame․ Insert the slide stop into its slot, making sure it clicks securely into place․ Use a roll pin punch to gently tap the pin into position, securing the slide stop․ Verify that the slide stop functions smoothly by cycling it several times․ Proper alignment and secure installation are critical to ensure the pistol operates correctly․ Avoid forcing the slide stop, as this could damage the frame or the component itself․ Once installed, proceed to the next steps in the reassembly process․
Step 2: Reattaching the Barrel and Barrel Link
To reattach the barrel and barrel link, align the barrel lug with the slide’s corresponding notch․ Gently push the barrel into place, ensuring it seats properly․ Next, insert the barrel link into the slide and frame, making sure it aligns correctly․ Use a slight twisting motion to secure it․ Reattach the barrel link pin, ensuring it is fully seated․ Finally, verify that the barrel is flush with the slide and functions smoothly․ If any part feels forced, stop and check the alignment․ Proper reassembly ensures reliability and accuracy․ Always handle with care to avoid damage or misalignment․
Step 3: Reassembling the Ignition System
Reassembling the ignition system is often considered the most challenging part of the process․ Begin by carefully aligning the sear and hammer, ensuring they fit properly into their respective positions․ Use a punch set to guide the components into place without applying excessive force․ Next, reinstall the trigger and its associated springs, ensuring they are securely fastened․ The disconnector should be aligned with the sear, and the hammer strut must be correctly positioned to avoid misalignment․ Once all parts are in place, gently tap them with a plastic hammer to ensure they seat correctly․ Finally, test the ignition system by cycling the hammer to ensure smooth operation․ This step requires patience and precision to guarantee reliable function․
Step 4: Reinstalling the Trigger and Magazine Catch

Reinstalling the trigger and magazine catch is a critical step in the reassembly process․ Begin by aligning the trigger with its housing, ensuring it fits snugly into place․ Gently press the trigger into position and secure it with the appropriate pin or screw, tightening firmly but avoiding overtightening․ Next, focus on the magazine catch․ Insert the catch into its designated slot on the frame, ensuring proper alignment; Use a screwdriver to tighten the screw securely․ Be careful with springs and small components to avoid misplacement or damage․ Once both parts are installed, test the trigger’s reset and the magazine catch’s functionality to ensure smooth operation․ This step requires precision to maintain the pistol’s reliability and performance․
Step 5: Reassembling the Grip Safety and Mainspring
Reassembling the grip safety and mainspring involves carefully aligning and securing these components․ Start by ensuring the mainspring is properly seated within its housing․ Use a punch to align the pins correctly․ Next, attach the grip safety to the frame, ensuring it moves freely and functions as intended․ Finally, verify that all parts are securely fastened and the safety mechanism operates smoothly․ Proper reassembly ensures reliability and safety․